Having trouble dealing with the irritating ” to connect to this network” problem in Windows 11? You’re definitely not alone, in this struggle. I’ve personally faced and dealt with this issue before so I know just how frustrating it can be when your Wi Fi unexpectedly goes offline. Fret not! I’ve got some fixes that will help you reconnect to the internet swiftly.
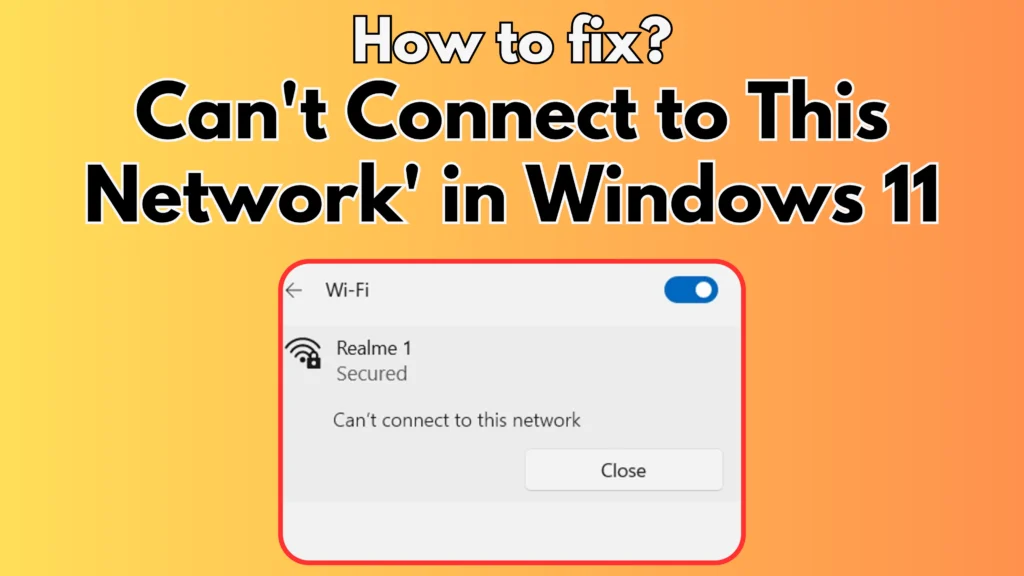
Table of Contents
Why Does This Happen?
Before we start addressing the issues at hand an overview of why you could be facing the “Windows 11 unable to connect to this network” problem.
- Outdated network drivers
- Incorrect Wi-Fi settings
- Router issues
- Windows updates gone wrong
Now, let’s get to those quick fixes!
1. Restart Your Device and Router
It might seem easy at glance but believe me when I say that this method works more frequently than you might expect!
Upon using Windows 11 for a week myself and experiencing connectivity problems, like the “Windows 11 WiFi can’t connect to this network” error message cropping up now and then. I found that a simple restart often does the trick, in resolving such issues effectively.

- Shut down your computer and turn off your router
- Wait for 30 seconds
- Turn on your router and wait for it to fully boot up
- Turn on your computer
If you’re encountering the “unable to connect to this network” issue on your Windows 11 system and it persists despite troubleshooting efforts far. It’s time to proceed to the solution.
2. Run the Network Troubleshooter
Sometimes when your laptop can’t connect to a network, on Windows 11. Windows 11 comes with a troubleshooter that can help fix network problems.
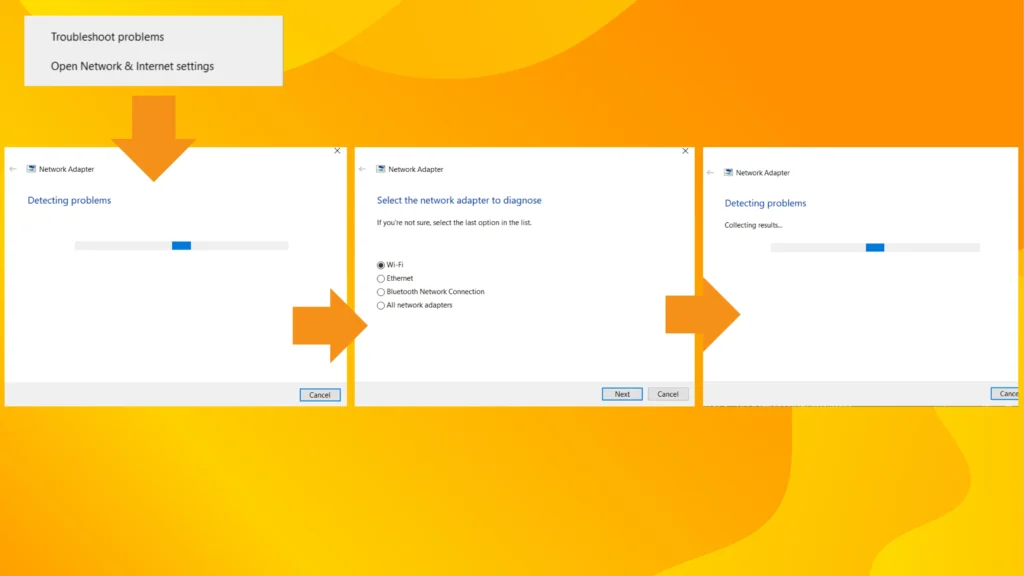
- Right-click on the Wi-Fi icon in the taskbar
- Select “Troubleshoot problems”
- Follow the on-screen instructions
I personally feel that this tool has improved in Windows 11. It solved my connection issues twice without any further action needed.
3. Update Your Network Drivers
Having drivers often leads to the issue of “Windows 11 22h WiFi not being able to connect to this network. Here’s how to update them:
- Press Win + X and select “Device Manager”
- Expand “Network adapters”
- Right-click on your Wi-Fi adapter and select “Update driver”
- Choose “Search automatically for drivers”
4. Reset Network Settings
If you’re still facing the “WiFi can’t connect to this network Windows 11” issue, try resetting your network settings:
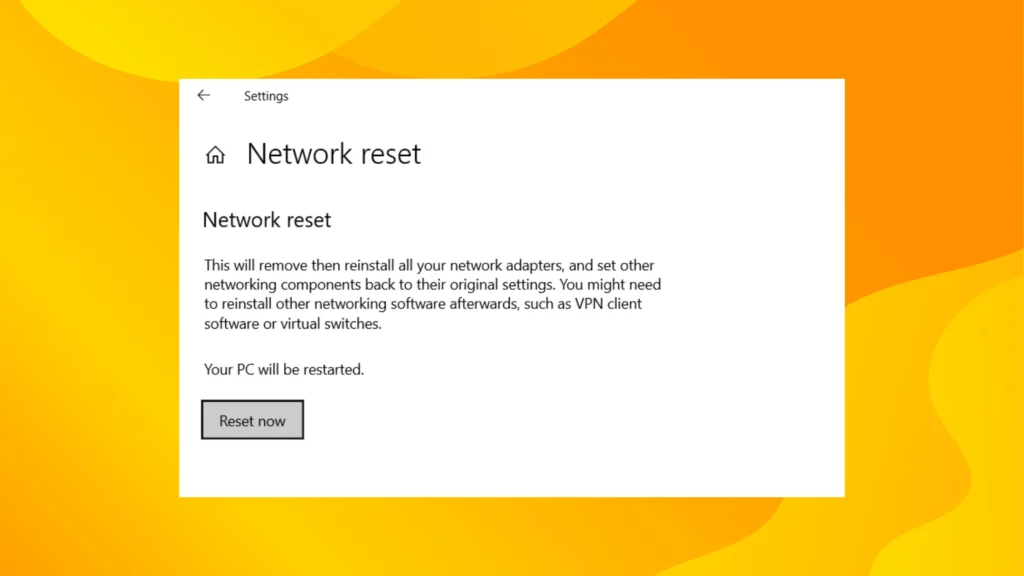
- Go to Settings > Network & Internet > Advanced network settings
- Click on “Network reset”
- Click “Reset now” and confirm
Remember, this will remove all your saved Wi-Fi networks, so you’ll need to reconnect to them.
5. Check for Windows Updates
Keeping your system up to date can resolve many issues, including when your “secured can’t connect to this network Windows 11.”
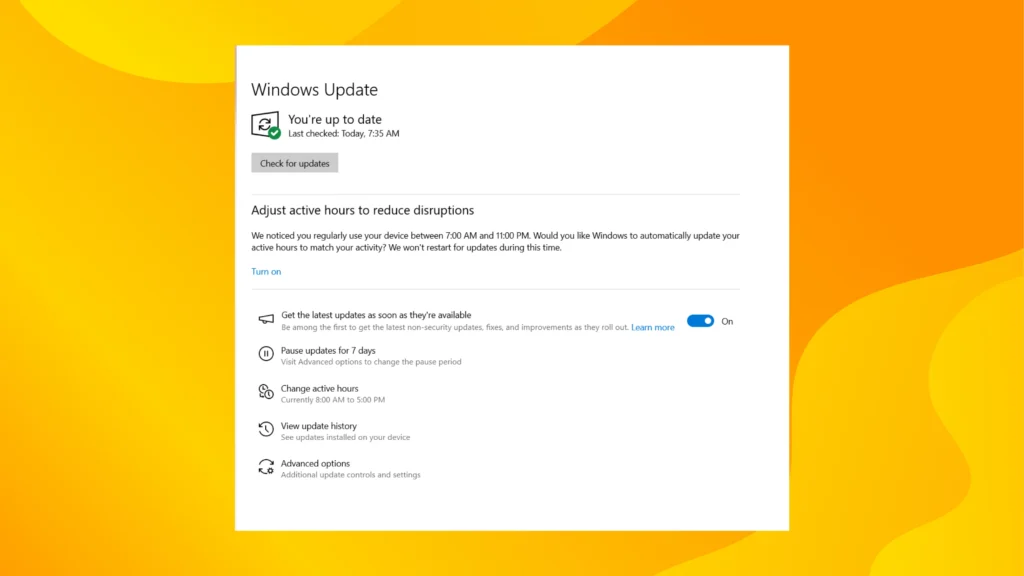
- Go to Settings > Windows Update
- Click “Check for updates”
- Install any available updates
6. Disable and Re-enable Your Wi-Fi Adapter
Sometimes, simply turning your Wi-Fi off and on can fix the “can’t connect to this network” error in Windows 11:
- Press Win + A to open Quick Settings
- Click on the Wi-Fi icon to turn it off
- Wait for 30 seconds
- Click the Wi-Fi icon again to turn it back on
7. Forget and Reconnect to the Network
If you’re still having trouble, try forgetting the network and reconnecting:
- Go to Settings > Network & Internet > Wi-Fi
- Click on “Manage known networks”
- Select your network and click “Forget”
- Reconnect to the network by entering the password again
After using Windows 11 for a months I’ve found that this method is effective, in addressing connection issues that seem to linger.
Bonus Tip: How to Fix ‘Can’t Connect to This Network’ in Windows 11
If none of the options mentioned earlier prove effective, for you you may have to consider attempting an solution. Here’s a strategy that has been successful, for users:
1. Open Command Prompt as administrator
Type the following commands, pressing Enter after each:
netsh winsock reset
netsh int ip reset
ipconfig /release
ipconfig /renew
2. flushdns
Type this below command to flushdns.
ipconfig /flushdns3. Restart your computer
This method helps refresh your network settings and can frequently fix connectivity problems.
Conclusion
If you’re having trouble, with the “unable to connect to this network” problem, in Windows 11 and need a fix try these solutions first. If the issue persists it might be worth checking your router settings or contacting your internet provider for some help.
Hey there’s something you should keep in mind. What helped me and some others might not be the solution, for your issue after all!. If you’re still struggling with staying connected after trying everything and find yourself wondering “Why is my computer having such a time connecting to this Windows 11 network?” it could be worth thinking about reaching out for help, from a professional.
Have you tried any of these methods to fix the problem of “not being able to connect to this network on Windows 11”? Have any of them worked for you effectively far? Feel free to share your experiences in the comments section!